• Skip to primary navigation
  • Skip to main content
  • Skip to primary sidebar

Remember Lenny

Writing online

  • Portfolio
  • Email
  • Twitter
  • LinkedIn
  • Github
You are here: Home / Archives for 2019

Archives for 2019

Weekly update Monday, February 4

February 20, 2019 by rememberlenny

Weekly update February 4,Ā 2019

I will be doing my best to send a bi-weekly update on the progress around my efforts to build out a street art genealogy online, and create a tool for preserving otherwise undocumented street art.

So far in 2019, I have many exciting updates:

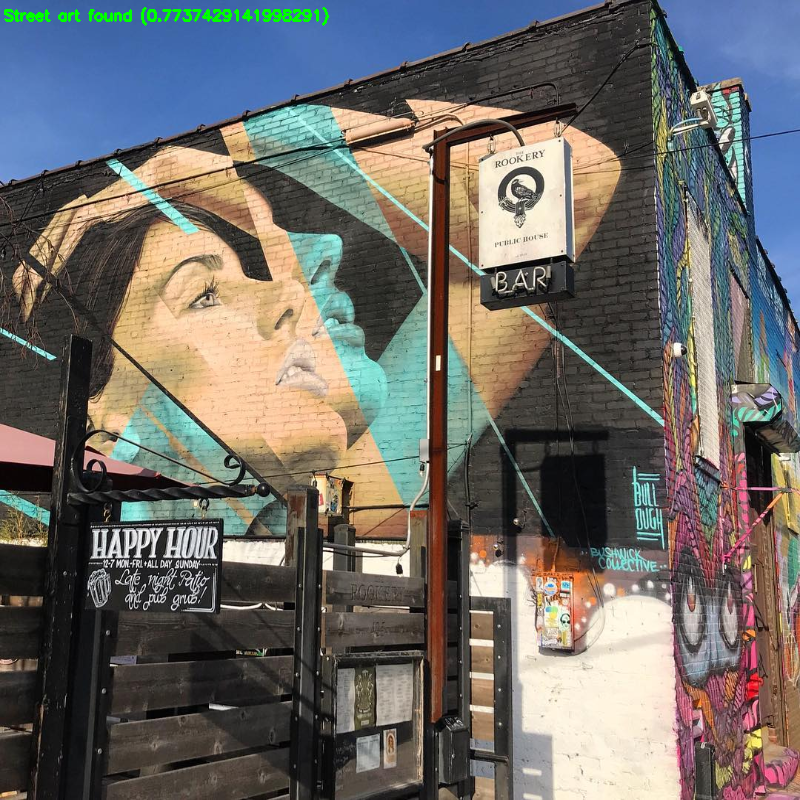
* Open-sourced tools for detecting street art in images using machine learning[¹]
* Published a 4000+ word article on how to train a convolutional neural network (CNN) to recognize street art in location tagged photos online.[²]
* Released a dataset of 6000 street art images and non-street art New York City images for CNN training.[³]
* Met with authors of three street art discovery/preservation apps [⁓]
* Presented the Public Art project and model training process at BetaWorks

I have been focusing on three major parts of this project: image collection, data analysis, and presentation.

For the image collection, I have continued to use Instagram scraping as the primary source for new images. Currently, this method has been effective for quickly gathering data to train deep learning models, but does not offer a long term solution for image aggregation. I have noticed a few times already that the primary methods for image collection have been shut down. Although I know this to be the case, I am able to gather hundreds of thousands of newly uploaded images a week, which is incomparable to any alternative user generated methods.

For data analysis, I have been analyzing images with associated location metadata by training deep learning models around artists and street art types (stencils, murals, letterform). I have also spent a lot of time with python notebooks, trying to find trends in certain periods of scraped images. I have been experimenting with ā€œhot spotā€ detection based on images photographed in an specific area in a small amount of time. For example, detecting when new images are found from multiple people within a smaller frequency than previously found.

Finally, for presentation, I have been working on two methods: website and email newsletter. For the website, I have fortunately been able to quickly build out a web interface for loading and navigating images, but do not feel that the current methods fulfill my original intention of the project. As a result, I have not publically released any updates on this front.

For the newsletter, I have created a set of tools to determine if ā€œnewā€ street art is discovered in a place. Currently, I manually run 4 of python scripts to based on monitoring new images found from certain locations. I am working on establishing a steady stream of images I can monitor, to generate a weekly newsletter of ā€œthe best local street artā€ for respective interested subscribers.

I have been recently encouraged to consider the larger vision around the Public Art project. I am building out a steady infrastructure for housing and collecting street art, but do not had a plan for attracting an active audience. With the analogy of building a city, I am building a beautiful city with few inhabitants, but could develop a blossoming city as populous as Tokyo. Based on this, I will be consolidating my efforts.

I would appreciate thoughts around whether or not to build a healthy business around the audience interested in street art, or to follow a non-profit route. When considering the business route, I can clearly see a productization of the collected images with a high margin art, such as printed posters. The sales model around street art products offers the opportunity for driving paid traffic to the website, which would also generate traffic that would lead to user-generated image contributions. If I pursue the non-profit route, I will not have the luxury of buying growth.

Please send your thoughts to [email protected]<mailto:[email protected]>

[1]: https://github.com/rememberlenny/streetart-notstreetart

[2]: https://blog.floydhub.com/instagram-street-art/

[3]: https://www.floydhub.com/rememberlenny/datasets/streetart-notstreetart/3

[4]: https://www.canvsart.com/ & https://artpigeon.nyc/

[5]: https://betaworks-studios.com

Filed Under: Uncategorized Tagged With: Artificial Intelligence, Machine Learning

On Building an Instagram Street Art Dataset and Detection Model

February 13, 2019 by rememberlenny


What if you could pump all of the Instagram photos of Banksy’s artwork into a program that could pinpoint where the next one’s likely to be?

Well, we aren’t there quite yet, but there’s still some really cool stuff you can accomplish using image analysis and machine learning to better understand street art.

You can use machine learning models to detect whether an Instagram photo contains street artā€Šā€”ā€Ševen classify the type of street art. For example, you can make a classifier for stencil art, letterform, portrait murals, or mixed medium installations.

In this article, I will go over how to build a deep learning model using TensorFlow and Keras that accomplishes the task of generally detecting street art by using publicly available social media data on Instagram.

Results from the first version of my model. Notice that there are number of false positives. We’ll improve this later by cleaning up our respective datasets.

To my knowledge, there isn’t a publicly available dataset of street art or graffiti. But we’ll go over a few simple techniques for creating datasets from publicly available images on the Internet and social mediaā€Šā€”ā€Šwhich will soon become indispensable tools in your machine learning toolkit. After reading this article, you’ll be able to leverage these methods to generate your own datasets for anything you need.

We’ll also learn how to build a TensorFlow model using Keras trained on our street art dataset. Then we will use this deep learning model to detect if new images contain street art photos.

Just pick an Instagram hashtag, grab some images, and train your deep learning model.

In the future, nearly everything will be photographed, and indirectly analyzable with machine learning. Learning how to train models to analyze this content yourself and understand the results is a superpower worth cultivating.

Overview of our Instagram street art dataset andĀ model

Here’s a quick overview of our process:

  1. Build a street art deep learning image dataset using hashtag results for #streetart
  2. Use the images to build a deep learning model that will predict if images contain street art
  3. Clean the dataset and retrain the model for improved results

We’ll follow these three steps to build a real functioning model for classifying street art.The model here is based on the ā€œDeep Residual Learning for Image Recognitionā€ (2015) paper’s ResNet model and can be duplicated using other architectures.

You can view the finalized codebase in this Github repository. You can also open up the codebase (including the datasets I’ve collected) on FloydHub in a JupyterLab Workspace by clicking this button:

Building the imageĀ dataset

Let’s recap our goal. We want to build a TensorFlow deep learning model that will detect street art from a feed of random images. We will start will pulling hash-tagged images that offer a good preliminary dataset of street art. Then, we will use the same method for pulling images to train against that is not street art, but may resemble the images that we will encounter. Using the two sets of images, we will train our model and be able to classify whether images do or don’t contain street art.

The Internet is full of places to gather data to train models. If you are looking for specific images, Google image searches offer an unbeatable way to get numerous images one a single subject. PyImageSearch provides an excellent guide on building a deep learning dataset using Google images.

Street art results from GoogleĀ images

Although the Google results method is straight forward, we want to emulate the process of building a model from social media data. As a result, we will train directly on the data source of choice: Instagram.

The same method discussed in the blog post linked above could be used for us. Simply load up Instagram’s web interface, search for the terms you want, then download all the images loaded in the browser.

We will go about it a little differently, in that we will use a library that simulates this process for us. While the method discussed below in one way to accomplish this, it is far from the only way.

If you want to skip downloading the street art images yourself, and just download a sample dataset, then skip to the next section titled: ā€œPrepare your datasetā€.

Getting street artĀ images

We will be using a Python library called Instaloader that provides an easy interface for setting a hashtag or location point. In the process, it will use the rate-limited interval and download images needed to train our model.

Details of the library can be found here: https://instaloader.github.io

Let’s start by setting up our Python environment and installing instaloader.

pip install instaloader

Thats all we need to get our library working. Next we will get our own street art image dataset for training our model. The instaloader library will do the command line command below:

$ instaloader --no-videos --no-metadata-json --no-captions "#streetart"

This command can be better understood by reviewing the instaloader docs:


In short, we will be downloading images that have the hashtag ā€œstreetartā€. We don’t want to download videos. The instaloader library will download the image’s caption data and metadata by default, so we also pass flags to prevent this.

Example of images gathered to help train our street art deep learningĀ model

In an alternative use case, we could also download the metadata associated with each image to collect the image’s respective longitude and latitude points. This would allow us to associate images with a specific location. Not all images have this metadata, but the downloaded data is still a good start. Definitely something that’s worth exploring in a future project!

Once the command above runs, you will see the command slowly downloading images into a newly created folder called /#streetart. Once you have enough images (approximately 1000 is a good base), then you can stop the command.

Getting images to compareĀ against


Next, we need to download images that are not street art related. This dataset will determine the environment in which our model will perform best. If we train against a series of identical types of images, such as pictures of cats or dogs, then our model will not be refined when deployed in a production environment.

In our hypothetical final case, we would like our model to perform well when classifying images from a location feed, so we will pull images from a city: New York. This will also be helpful as our models trains, because the image set from New York will contain content that will help the model differentiate certain urban subjects from the street art content.

Please note, when you use the method above, you will get a wide range of images. Due to forces beyond our control, some of these images may be not safe for work. 😬

To download images for a specific location, you must first find the location’s id. To find this, you can log into the Instagram web interface and do a search for the location you want. The URL will populate with the location’s ID, as seen below:

https://www.instagram.com/explore/locations/212988663/new-york-new-york/

As seen in the URL above, the New York location id is: 212988663. Using this location id, now initiate a new instaloader query:

$ instaloader --no-videos --no-metadata-json --no-captions "%212988663"


Similar to before, the command above will download images from the location id of choice, without any extra files. Let this process run for as long as you ran the previous command, so you have an even number of images in your two image sets.

Example of images that we will use in our training dataset of content that is ā€œnot streetĀ artā€~

Prepare yourĀ dataset

If you followed the instructions above, you should have two directories titled /#streetart or /%212988663 respectively. First, because navigating non-alphanumeric in file names is a pain in the butt, lets rename those directories /streetart and /not_streetart respectively.

Now create a folder called /images and move the two folders. Your file directory should look like this:

.
└── dataset
└── images
ā”œā”€ā”€ not_streetart
└── streetart

If you didn’t follow the instructions above, you can download the dataset I’ve already prepared from FloydHub here:

https://www.floydhub.com/rememberlenny/datasets/streetart-notstreetart/

You can also run the corresponding Python notebook in a FloydHub Workspace. This will let you easily follow along with the model training code in Jupyter Notebook workspace.

Now that we have our images to train with, we need a way to break them up into the proper training, validation, and test sets. We can do this with the following script pulled from Adrian Rosebrock’s build script:

Code is adapted from Rosebrock’s build_dataset.py:

import random
import shutil
import os
from imutils import paths
# Set up paths for original images and training/validation/test
ORIGINAL_IMAGES = "dataset/images"
TRAINING_PATH = "dataset/training"
VALIDATION_PATH = "dataset/validation"
TESTING_PATH = "dataset/testing"
# Define the percentage of images used in training (80%),
# and the amount of validation data
TRAINING_SPLIT = 0.8
VALIDATION_SPLIT = 0.1

First we start with our imports and setting constants. imutils is a useful library created by Rosebrock for easy file and path manipulation.

# Access and shuffle original images
imagePaths = list(paths.list_images(ORIGINAL_IMAGES))
random.seed(42)
random.shuffle(imagePaths)
# Compute the training and testing split
i = int(len(imagePaths) * TRAINING_SPLIT)
trainingPaths = imagePaths[:i]
testingPaths = imagePaths[i:]
# Use part of the training data for validation
i = int(len(trainingPaths) * VALIDATION_SPLIT)
validationPaths = trainingPaths[:i]
trainingPaths = trainingPaths[i:]
# Define the datasets
datasets = [
("training", trainingPaths, TRAINING_PATH),
("validation", validationPaths, VALIDATION_PATH),
("testing", testingPaths, TESTING_PATH)
]

Next, we prepare our image files into the various training, validation and test sets. This allows us to have a unique set of images that are used for training and validation, then separately for testing.

for (dType, imagePaths, baseOutput) in datasets:
# If output directory doesn't exit, create it
if not os.path.exists(baseOutput):
os.makedirs(baseOutput)

# Loop over the input image paths
for inputPath in imagePaths:
# Extract the filename of the input image along with its
# corresponding class label
filename = inputPath.split(os.path.sep)[-1]
label = inputPath.split(os.path.sep)[-2]
# Build the path to the label directory
labelPath = os.path.sep.join([baseOutput, label])
# If label output directory doesn't exist, create it
if not os.path.exists(labelPath):
os.makedirs(labelPath)
    # Construct the path to the destination image and then copy
# the image itself
p = os.path.sep.join([labelPath, filename])
shutil.copy2(inputPath, p)

Finally, we should copy our training, validation and testing datasets in their own respective directories.

Dataset prepĀ summary


To summarize, the script checks for your images in /dataset/images, then does the following:

  1. Load all the original downloaded images into memory, and shuffle them around to be in a random order.
  2. Split up the images into a following set: 80% reserved for training (10% of which will be for validation) and then the remaining 20% will be for testing.
  3. Make the respective directories and move images into /dataset/training, /dataset/validation, and /dataset/testing.

Note: All of your original images will stay in the /dataset/images folder.Once your dataset is split up, your images are ready to be used for training.

Train your deep learningĀ model

Now we will use our dataset to train our model. Our deep learning model will be trained using Keras with a ResNet based CNN architecture.

The training code below is primarily taken from lessons in the Deep Learning for Computer Vision with Python book and, as you might have already guessed at this point, the PyImageSearch blog by Adrian Rosebrock. I really enjoy his blog and can’t recommend it enough for concrete code examples and practical tutorials. As a result, much of the points below will be summary points and a link to the final code.

Code is adapted from Rosebrock’s save_dataset.py, which we will call train_model.py.

from keras.preprocessing.image import ImageDataGenerator
from keras.optimizers import SGD
from pyimagesearch.resnet import ResNet
from sklearn.metrics import classification_report
from imutils import paths
import numpy as np
NUM_EPOCHS = 30
BATCH_SIZE = 32
TRAINING_PATH = "dataset/training"
VALIDATION_PATH = "dataset/validation"
TESTING_PATH = "dataset/testing"
MODEL_NAME = "streetart_classifer.model"
# Determine the total number of image paths in training, validation,
# and testing directories
totalTrain = len(list(paths.list_images(TRAINING_PATH)))
totalVal = len(list(paths.list_images(VALIDATION_PATH)))
totalTest = len(list(paths.list_images(TESTING_PATH)))

To start, we will import our dependencies and assign our constants.

We will be using Keras as our training library because it’s simple and provides a thorough API for our needs. The same steps could be replicated with other deep learning libraries like PyTorch and the fast.ai library. Keras provides a simple, module neural network library that can flexibly use various other machine learning frameworks as its backend. In my case, I will be using it with TensorFlow, but that shouldn’t matter. One note about Keras is it doesn’t support multi-GPU environments by default for training a network.

Note the pyimagesearch.resnet import: this is a folder containing our Keras implementation of our ResNet architecture.

# Initialize the training training data augmentation object
trainAug = ImageDataGenerator(
rescale=1 / 255.0,
rotation_range=20,
zoom_range=0.05,
width_shift_range=0.05,
height_shift_range=0.05,
shear_range=0.05,
horizontal_flip=True,
fill_mode="nearest")

# Initialize the validation (and testing) data augmentation object
valAug = ImageDataGenerator(rescale=1 / 255.0)

Unlike the ImageNet or COCO, our dataset is relatively small. Because ā€œstreet artā€ comes in many shapes, sizes, colors, and in a variety of environments, we will use data augmentation to help improve our training. Using the Keras image preprocessing API, we will create data augmentation objects to generate new images from our dataset with random modifications.

To learn more about data augmentation, see the Keras API documentation or take a look at a great blog post on data augmentation.

# Initialize the training generator
trainGen = trainAug.flow_from_directory(
TRAINING_PATH,
class_mode="categorical",
target_size=(64, 64),
color_mode="rgb",
shuffle=True,
batch_size=BATCH_SIZE)

# Initialize the validation generator
valGen = valAug.flow_from_directory(
VALIDATION_PATH,
class_mode="categorical",
target_size=(64, 64),
color_mode="rgb",
shuffle=False,
batch_size=BATCH_SIZE)

# Initialize the testing generator
testGen = valAug.flow_from_directory(
TESTING_PATH,
class_mode="categorical",
target_size=(64, 64),
color_mode="rgb",
shuffle=False,
batch_size=BATCH_SIZE)

Once the augmentation objects are setup, we will generate the new images on the fly for our training, validation, and testing datasets.

# Initialize our Keras implementation of ResNet model and compile it
model = ResNet.build(64, 64, 3, 2, (2, 2, 3),
(32, 64, 128, 256), reg=0.0005)
opt = SGD(lr=1e-1, momentum=0.9, decay=1e-1 / NUM_EPOCHS)
model.compile(loss="binary_crossentropy", optimizer=opt,
metrics=["accuracy"])

# Train our Keras model
H = model.fit_generator(
trainGen,
steps_per_epoch=totalTrain // BATCH_SIZE,
validation_data=valGen,
validation_steps=totalVal // BATCH_SIZE,
epochs=NUM_EPOCHS)

# Reset the testing generator and then use our trained model to
# make predictions on the data
print("[INFO] evaluating network...")
testGen.reset()
predIdxs = model.predict_generator(testGen,
steps=(totalTest // BATCH_SIZE) + 1)

# For each image in the testing set we need to find the index of the
# label with corresponding largest predicted probability
predIdxs = np.argmax(predIdxs, axis=1)
# show a nicely formatted classification report
print(classification_report(testGen.classes, predIdxs,
target_names=testGen.class_indices.keys()))

We build, compile, and train our ResNet model using the augmented street art dataset. Our training script will make predictions on the test dataset, then index the highest probability class on each prediction.

# Save the neural network to disk
print("[INFO] serializing network to '{}'...".format(MODEL_NAME))
model.save(MODEL_NAME)

The final results will be stored in a model named streetart_classifer.model which we can then deploy to classify new street art.

Training summary

In summary, the training script does the following:

  1. Import the various preprocessing services and helper utilities from libraries such as Keras. Also assign our constant values that we will use to access our dataset.
  2. Set up data augmentation objects to prepare our small dataset for training our deep learning model.
  3. Prepare our data augmentation objects to process our training, validation and testing dataset.
  4. Build, compile and train our ResNet model using our augmented dataset, and store the results on each iteration.
  5. Finally, save the trained model.

Using our trained street art model to classify new Instagram photos

Now that you have a model that detects street art effectively, we can see how it works on real images.We will use the following code below to evaluate the model against an image, and then render the results onto the image with the OpenCV python library.

from keras.preprocessing.image import img_to_array
from keras.models import load_model
import numpy as np
import random
import cv2
from imutils import build_montages
from IPython.display import Image

Assuming this is a new environment, first we load our libraries. We will use the Keras load_model function to use our newly created model and also load in some utility libraries for testing the model on a random sets of data. One convenient utility library, imutils provides a function that easily renders an image montage when fed a list of images.

MODEL_NAME = 'save_model.model'
MONTAGE_FILENAME = 'streetart_photo.png'
IMAGES_PATH = 'dataset/testing'
model = load_model(MODEL_NAME)
imagePaths = list(paths.list_images(IMAGES_PATH))
random.shuffle(imagePaths)
imagePaths = imagePaths[:1]
# initialize our list of results
results = []

Now we will set our constants referencing our model, rendered image name, and sample image path.

If we are in a Python Jupyter Notebook, we don’t need to load the model again.We will then load our test image path and randomly select an image to load. In the imagePaths[:1] definition, the 1 determines how many images to load, and can be increased according to the next part.

# loop over our sampled image paths
print("[INFO] evaluating model against test set...")
for p in imagePaths:
# load our original input image
orig = cv2.imread(p)
        # pre-process our image by converting it from BGR to RGB channel
# ordering (since our Keras mdoel was trained on RGB ordering),
# resize it to 64x64 pixels, and then scale the pixel intensities
# to the range [0, 1]
image = cv2.cvtColor(orig, cv2.COLOR_BGR2RGB)
image = cv2.resize(image, (64, 64))
image = image.astype("float") / 255.0
        # order channel dimensions (channels-first or channels-last)
# depending on our Keras backend, then add a batch dimension to
# the image
image = img_to_array(image)
image = np.expand_dims(image, axis=0)
        # make predictions on the input image
pred = model.predict(image)
print(pred)
not_street_art_probability = pred.item(0)
street_art_probability = pred.item(1)
pred = pred.argmax(axis=1)[0]
        # an index of zero is the 'Not street art' label while an index of
# one is the 'Street art found' label
label = "Not street art ({0})".format(not_street_art_probability) if pred == 0 else "Street art found ({0})".format(street_art_probability)
color = (255, 0, 0) if pred == 0 else (0, 255, 0)
        # resize our original input (so we can better visualize it) and
# then draw the label on the image
orig = cv2.resize(orig, (800, 800))
cv2.putText(orig, label, (3, 20), cv2.FONT_HERSHEY_SIMPLEX, 0.5,
color, 2)
        # add the output image to our list of results
results.append(orig)

We will loop over the images in our test file paths. If we only load one image, this is redundant. We load the image and invoke our model’s predict function to get the probability score for the image containing street art. The array we get back has the ā€œNot street artā€ score at index zero, and ā€œStreet art foundā€ score on index one.

We generate a new image and apply text using OpenCV’s putText method. The text contains the image’s predicted label and the respective probability score.

Once the image is created, we append it onto the results array.

montage = build_montages(results, (800, 800), (1, 1))[0]
cv2.imwrite(MONTAGE_FILENAME, montage)
img = cv2.imread(MONTAGE_FILENAME)
Image(filename=MONTAGE_FILENAME)

Finally, we use the build_montages library to render the images in the results array to create a montage. You can learn about the build_montages function here. In our example, we are only rendering one image, but the third parameter for build_montages can be changed to determine the number of rows and columns of images to render from the image array source. This is what I used to make the large montage of labeled images earlier in this post.

For reference on using build_montages, you can see another example of using the build_montage function below:

# Example for using build_montage, and not part of the street art model evaluation
import cv2
from imutils import build_montages
IMAGES_PATH = 'dataset/testing'
imagePaths = list(paths.list_images(IMAGES_PATH))
imagePaths = imagePaths[:3]
img_list = []
for p in imagePaths:
# load our original input image
orig = cv2.imread(p)
img_list.append(orig)
# convert image list into a montage of 256x256 images tiled in a 3x1 montage
montages = build_montages(img_list, (256, 256), (3, 1))
# iterate through montages and display
for montage in montages:
cv2.imshow('montage image', montage)
cv2.waitKey(0)

Now back to the model evaluation.

We store the resulting montage as an image and then use the IPython helper function to render the image. If we run this script as an independent file, we could also invoke the OpenCV image display function.

The images below are three examples of running the model evaluation code. I ran the notebook with the code and saved the images from the notebook as a file.

Street art found (even though this chameleon tried to blendĀ in)

More notorious street artĀ found!

Not street art. But, yes, adorableĀ puppy.

Our image classifier successfully detects street art, as seen in the two images above. Each of the images with a mural painting in the image are classified correctly.

When we run the same classifier against an obviously non-street art images, we receive the high probability ā€œNot street artā€ result as well.

Viewing false positives

Some of the false positives from the model are images that depend on a person’s interpretation for street art. Based on the photos we trained against, photos of urban building landscapes and advertisements are incorrectly categorized.

In our case, this hashtag dataset is an imprecise classification system in general, since some people will tag things incorrectly or subjectively.

False positive of a blueĀ building

Improving theĀ results

Based on our initial dataset of hashtag and location datasets, I got roughly 60~65% accuracy with my training results. I was training on a 1080TI NVIDIA card with a batch size of 32 and 30 epochs over an hour.

To significantly improve this, one concrete step to take is manually review the dataset for the /dataset/images/streetart and /dataset/images/not_streetart. By reviewing the folders content, you can manually delete the images that are incorrectly labeled. In our case, because we pull data from Instagram and are using an undependable primary marker – the hashtags – to determine our dataset, we potentially have the wrong content appearing in the street art and not street art folders.

Once I reviewed the original crawled images, I found many images that had the hashtag streetart, but were not actually street art related. For example, images with no street art in the photo with the hashtag #streetart, which pollutes the model training. Similarly, in the /not_streetart folder, since New York is one of the most popular places for finding street art, I found pictures from the New York City location feed that were actually of street art or graffiti. To clean up the classifier, I had to delete these photos.

Cleaning theĀ dataset

After cleaning up the datasets manually and running the training process again, I was able to achieve an improvement in the model to 80% accuracy. You can see the run data on FloydHub here. FloydHub automatically generates Training Metrics charts for each job when you’re using Keras:


Next steps for Instagram street artĀ model

This was a practical application of building your own deep learning dataset around a social media source and training a model to classify the respective subject. While street art was the subject of this post, the same techniques could be used for subject of your choosing.

To take this further, the images being analyzed for street art could be segmented to differentiate paintings and their backgrounds. Scene recognition models would be hugely impactful at reducing the false positives caused by various indoor artwork. Similarly, using other models such as the PlacesCNN, we could identify the ā€œstreet art-nessā€ that resonates through the finalized model.

If you’re interested in analyzing street art, you could expand this project even further by:

  • Get street art images labeled with the artist
  • Build a model for categorizing different kinds of street art
  • Explore the comment and image description metadata associated to the images with semantic analysis
  • Correlate the location metadata on images to find correlations or unique qualities by geography
  • Analyzed street art location data to find correlations or trends to social phenomena
  • Use the models in production to compare against live location feeds

Thanks to

FloydHub’s AI Writer program and Charlie Harrington for editorial support! Huge thanks to Adrian Rosebrock’s blog for the many code examples used. Thanks to Tyler Cowen’s Emergent Ventures for grant funding to explore this project and the Pioneer Tournament, led by Daniel Gross and Rishi Narang.


About Lenny

Lenny is building a digital genealogy of street art at Public Art. He’s scraping the internet and making a searchable database of street art around the world. One of his project’s goals is to amplify the voice of ā€œprotest artā€ against the constraints of censorship from autocratic governments. He’s also a FloydHub AI Writer.

You can follow along with Lenny on Twitter at @rememberlenny or his project newsletter http://publicart.io.

Links

  • Complete code examples
  • Building a deep learning dataset with Google Images
  • Instaloader
  • Prepared dataset used in this post
  • PyImageSearch blog post on building a deep learning model for medical image analysis with Keras
  • PyImageSearch blog post on saving a deep learning model build with Keras
  • PyImageSearch blog post on data augmentation with Keras
  • PlacesCNN
  • Public Art

Originally posted on FloydHub’s AI Writer’s blog: https://blog.floydhub.com/instagram-street-art/

Filed Under: Uncategorized Tagged With: Deep Learning, Digital Humanities, Instagram Marketing, Machine Learning, Street Art

  • « Go to Previous Page
  • Go to page 1
  • Go to page 2

Primary Sidebar

Recent Posts

  • Thoughts on my 33rd birthday
  • Second order effects of companies as content creators
  • Text rendering stuff most people might not know
  • Why is video editing so horrible today?
  • Making the variable fonts Figma plugin (part 1 – what is variable fonts [simple])

Archives

  • August 2022
  • February 2021
  • October 2020
  • September 2020
  • August 2020
  • December 2019
  • March 2019
  • February 2019
  • November 2018
  • October 2018
  • April 2018
  • January 2018
  • December 2017
  • October 2017
  • July 2017
  • February 2017
  • January 2017
  • November 2016
  • October 2016
  • August 2016
  • May 2016
  • March 2016
  • November 2015
  • October 2015
  • September 2015
  • July 2015
  • June 2015
  • May 2015
  • March 2015
  • February 2015
  • January 2015
  • December 2014
  • November 2014
  • October 2014
  • September 2014
  • August 2014
  • July 2014
  • June 2014
  • May 2014
  • April 2014
  • March 2014
  • February 2014
  • January 2014
  • December 2013
  • October 2013
  • June 2013
  • May 2013
  • April 2013
  • March 2013
  • February 2013
  • January 2013
  • December 2012

Tags

  • 10 year reflection (1)
  • 100 posts (2)
  • 2013 (1)
  • academia (2)
  • Advertising (3)
  • aging (1)
  • Agriculture (1)
  • analytics (3)
  • anarchy (1)
  • anonymous (1)
  • api (1)
  • arizona (1)
  • Art (2)
  • art history (1)
  • artfound (1)
  • Artificial Intelligence (2)
  • balance (1)
  • banksy (1)
  • beacon (1)
  • Beacons (1)
  • beast mode crew (2)
  • becausewilliamshatner (1)
  • Big Data (1)
  • Birthday (1)
  • browsers (1)
  • buddhism (1)
  • bundling and unbundling (1)
  • china (1)
  • coding (1)
  • coffeeshoptalk (1)
  • colonialism (1)
  • Communication (1)
  • community development (1)
  • Computer Science (1)
  • Computer Vision (6)
  • crowdsourcing (1)
  • cyber security (1)
  • data migration (1)
  • Deep Learning (1)
  • design (1)
  • designreflection (1)
  • Developer (1)
  • Digital Humanities (2)
  • disruption theory (1)
  • Distributed Teams (1)
  • drawingwhiletalking (16)
  • education (3)
  • Email Marketing (3)
  • email newsletter (1)
  • Employee Engagement (1)
  • employment (2)
  • Engineering (1)
  • Enterprise Technology (1)
  • essay (1)
  • Ethics (1)
  • experiement (1)
  • fidgetio (38)
  • figma (2)
  • film (1)
  • film industry (1)
  • fingerpainting (8)
  • first 1000 users (1)
  • fonts (1)
  • forms of communication (1)
  • frontend framework (1)
  • fundraising (1)
  • Future Of Journalism (3)
  • future of media (1)
  • Future Of Technology (2)
  • Future Technology (1)
  • game development (2)
  • Geospatial (1)
  • ghostio (1)
  • github (2)
  • global collaboration (1)
  • god damn (1)
  • google analytics (1)
  • google docs (1)
  • Graffiti (23)
  • graffitifound (1)
  • graffpass (1)
  • growth hacking (1)
  • h1b visa (1)
  • hackathon (1)
  • hacking (1)
  • hacking reddit (2)
  • Hardware (1)
  • hiroshima (1)
  • homework (1)
  • human api (1)
  • I hate the term growth hacking (1)
  • ie6 (1)
  • ifttt (4)
  • Image Recognition (1)
  • immigration (1)
  • instagram (1)
  • Instagram Marketing (1)
  • internet media (1)
  • internet of things (1)
  • intimacy (1)
  • IoT (1)
  • iteration (1)
  • jason shen (1)
  • jobs (2)
  • jrart (1)
  • kickstart (1)
  • king robbo (1)
  • labor market (1)
  • Leonard Bogdonoff (1)
  • Literacy (1)
  • location (1)
  • Longform (2)
  • looking back (1)
  • los angeles (1)
  • Machine Learning (13)
  • MadeWithPaper (106)
  • making games (1)
  • management (1)
  • maps (2)
  • marketing (4)
  • Marketing Strategies (1)
  • Media (3)
  • medium (1)
  • mentor (1)
  • message (1)
  • mindmeld games (1)
  • Mobile (1)
  • Music (2)
  • Music Discovery (1)
  • neuroscience (2)
  • new yorker (1)
  • Newspapers (3)
  • nomad (1)
  • notfootball (2)
  • npaf (1)
  • odesk (1)
  • orbital (14)
  • orbital 2014 (14)
  • orbital class 1 (9)
  • orbitalnyc (1)
  • paf (2)
  • paid retweets (1)
  • painting (1)
  • physical web (1)
  • pitching (2)
  • popular (1)
  • post production (1)
  • Privacy (1)
  • process (1)
  • product (1)
  • Product Development (2)
  • product market fit (2)
  • Programming (6)
  • project reflection (1)
  • promotion (1)
  • prototype (17)
  • prototyping (1)
  • Public Art (1)
  • Public Speaking (1)
  • PublicArtFound (15)
  • Publishing (3)
  • Python (1)
  • quora (1)
  • Rails (1)
  • React (1)
  • React Native (1)
  • real design (1)
  • recent projects (1)
  • reddit (3)
  • redesign (1)
  • reflection (2)
  • rememberlenny (1)
  • Remote work (1)
  • replatform (1)
  • Responsive Emails (1)
  • retweet (1)
  • revenue model (1)
  • rick webb (1)
  • robert putnam (1)
  • ror (1)
  • rubyonrails (1)
  • segmenting audience (1)
  • Semanticweb (2)
  • Senior meets junior (1)
  • SGI (1)
  • Side Project (1)
  • sketching (22)
  • social capital (1)
  • social media followers (2)
  • social media manipulation (1)
  • social media marketing (1)
  • social reach (5)
  • software (3)
  • Soka Education (1)
  • Spatial Analysis (2)
  • spotify (1)
  • stanford (2)
  • Startup (21)
  • startups (7)
  • stree (1)
  • Street Art (4)
  • streetart (5)
  • stylometrics (1)
  • Technology (1)
  • thoughts (1)
  • Time as an asset in mobile development (1)
  • Towards Data Science (4)
  • TrainIdeation (42)
  • travel (1)
  • traveling (1)
  • tumblr milestone (2)
  • twitter (1)
  • twitter account (2)
  • typography (2)
  • unreal engine (1)
  • user behavior (1)
  • user experience (3)
  • user research (1)
  • user testing (1)
  • variable fonts (1)
  • video editing (2)
  • visual effects (1)
  • warishell (1)
  • Web Development (8)
  • webdec (1)
  • webdev (13)
  • windowed launch (1)
  • wordpress (1)
  • Work Culture (1)
  • workinprogress (1)
  • zoom (1)